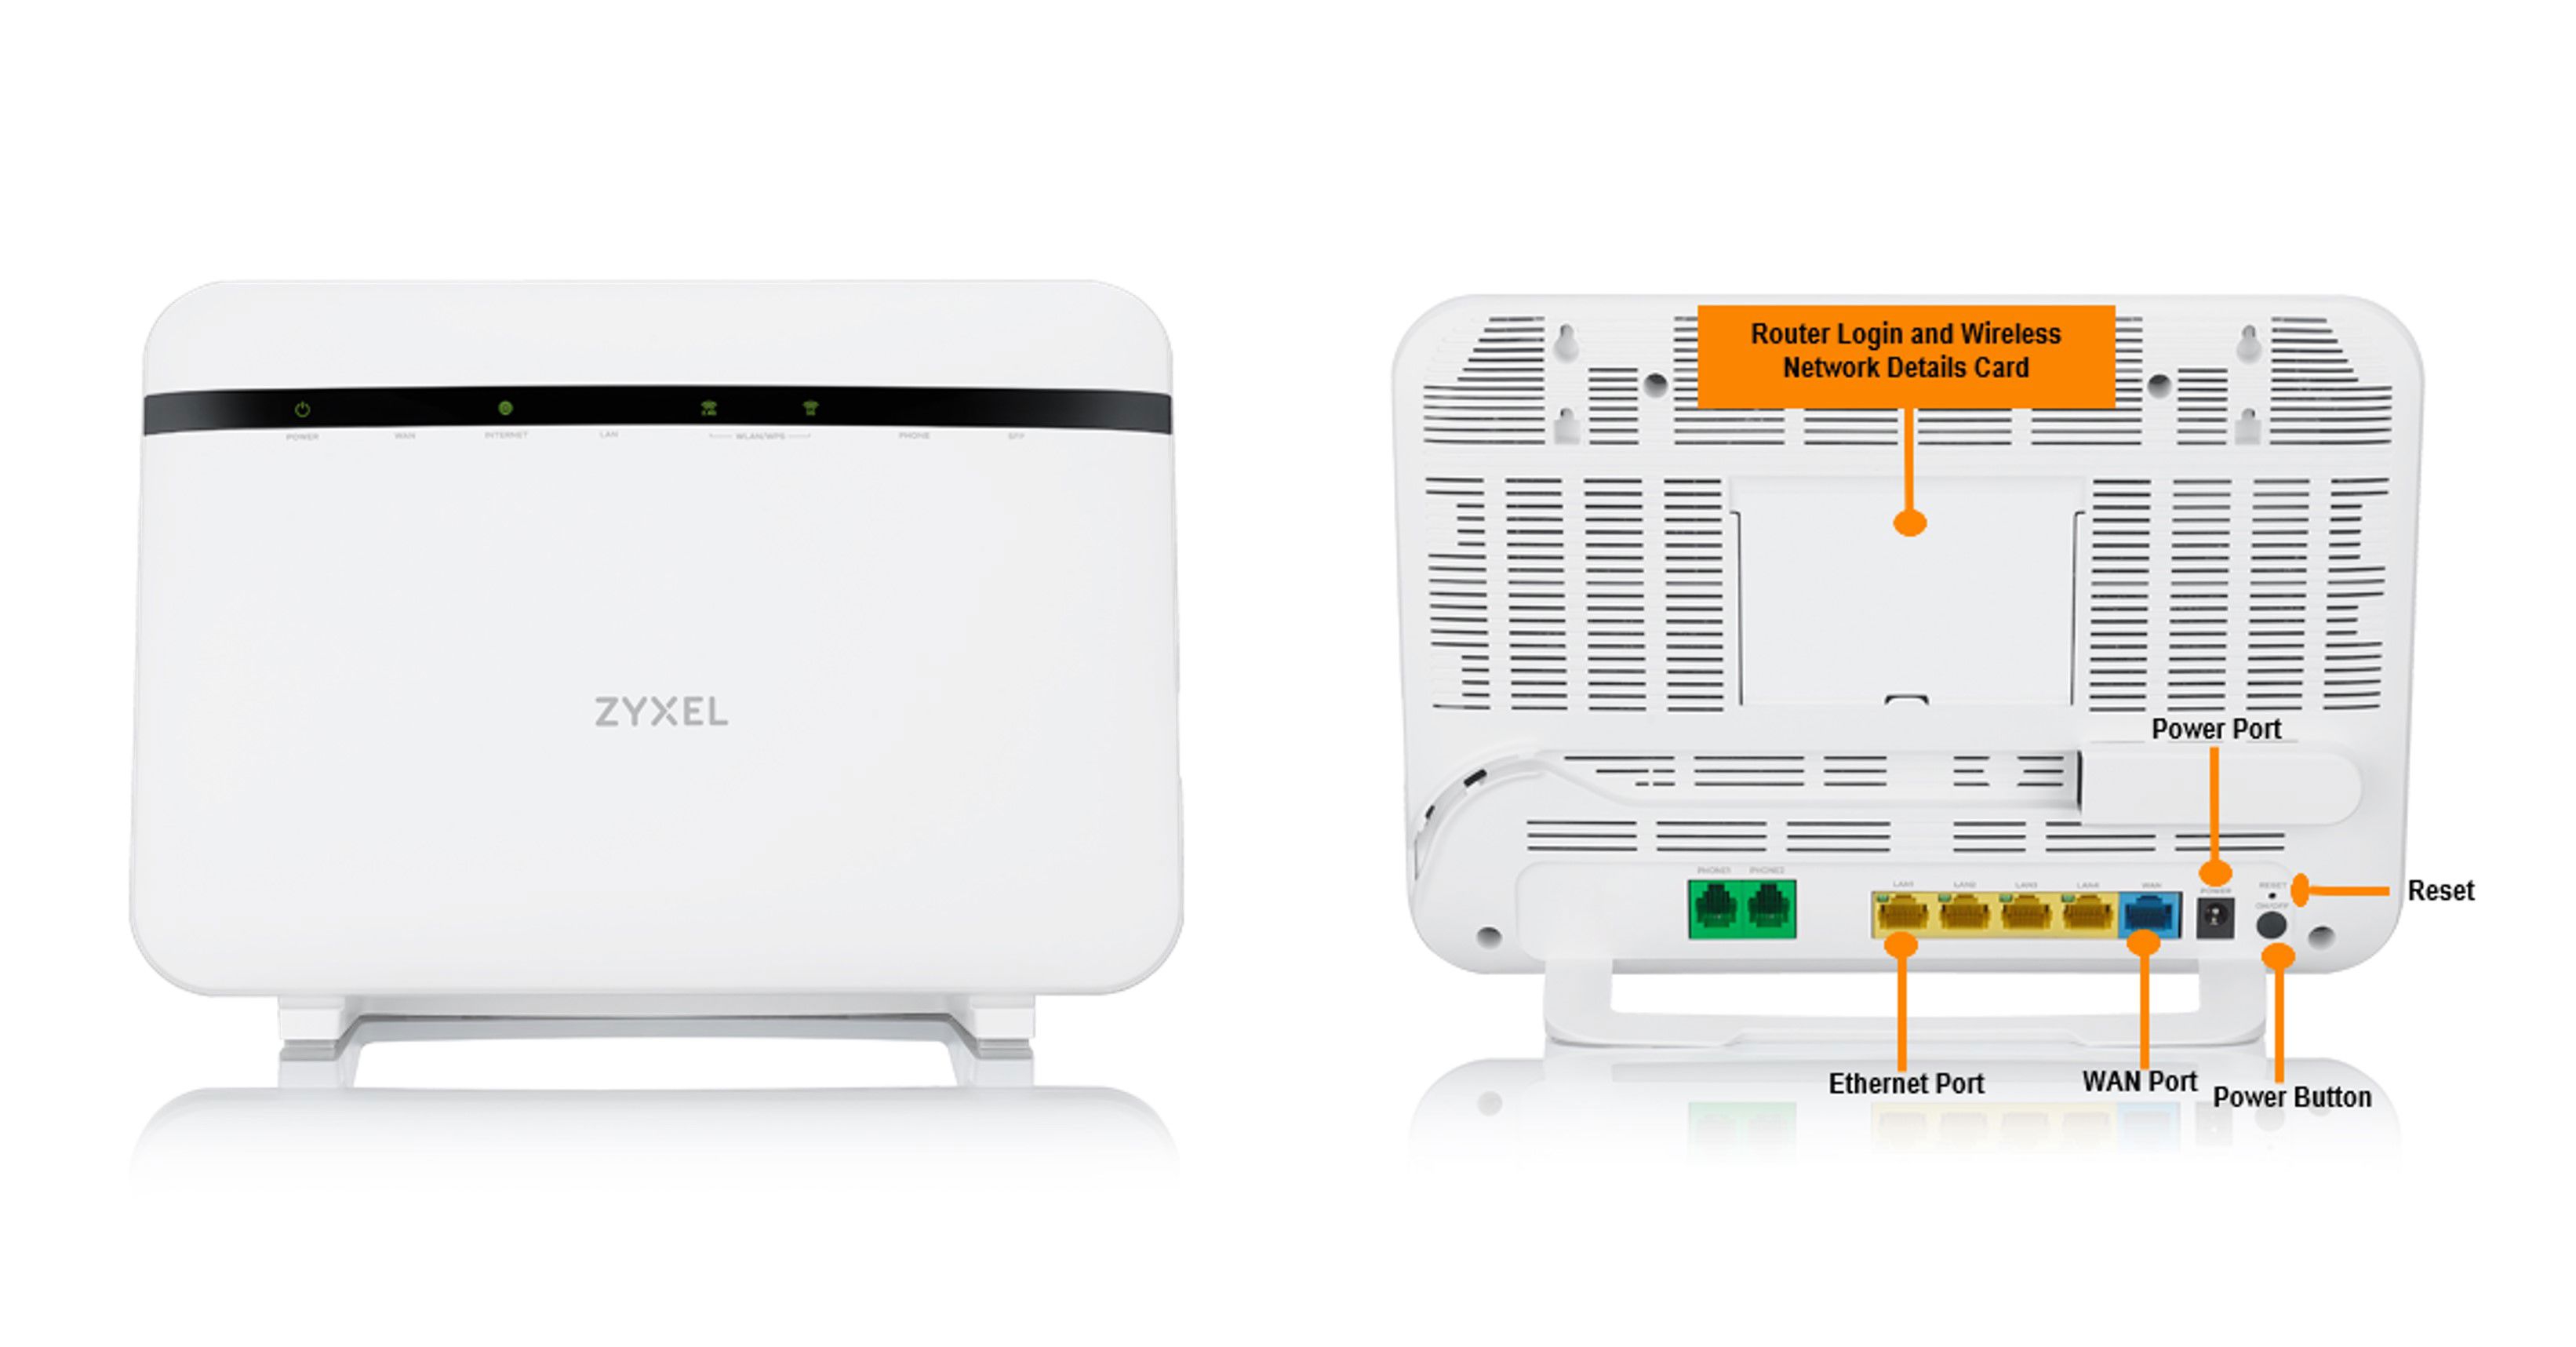
LightHub 2.0 Zyxel EX 5401 Installation Guide
Written by KCOM Support on 11/06/2025. Posted in Broadband.
![]()
Contents

Initial setup
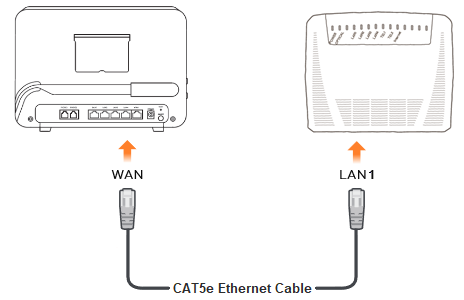
- Connect a CAT5e or higher category Ethernet cable into the WAN socket on your router and connect the other end of this cable into the LAN1 socket on the ONT.
![Initial Setup 1]()
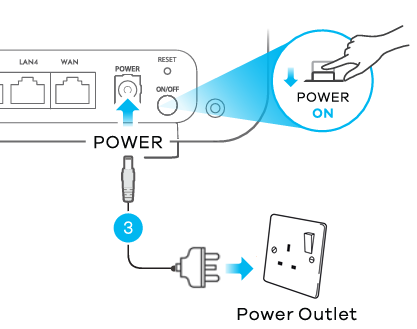
- Connect the provided power supply to the power jack on the router and plug this into a wall socket, making sure that the Power button is pushed inwards.
![Initial Setup 2]()
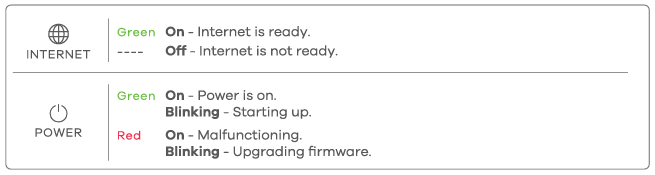
![Lights Key]()
Connecting devices
Connecting wirelessly / Using SSID (Recommended)
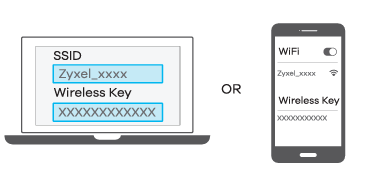
- Use your router's SSID and Wireless Key on the card provided, or the device label.
![Connecting Devices 1]()
- Locate the matching SSID under the Wireless settings on your device and enter the wireless key to connect.
![Connecting Devices Phone]()

Connecting wirelessly / Using QR code
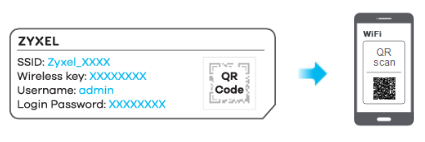
- Similarly to the SSID method, scan the QR code on the card provided or the router label.
![Connecting Devices Card]()
- Enter the Wireless Key from the card or label on the router to connect your device.
Connect wirelessly / Using WPS
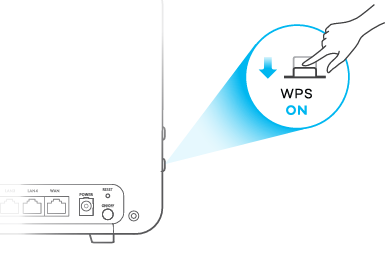
- Press and hold the WPS button located on the top of the router for 5 seconds.
![Connecting Devices WPS Button]()
- Within 2 minutes, press the WPS button located on your device to connect.
![WPS Android]()
![Wi-Fi Lights Key]()


Connecting wired / Using LAN
Connect a CAT5e or higher category Ethernet cable into a LAN port on your router and connect the other end of this cable into the device.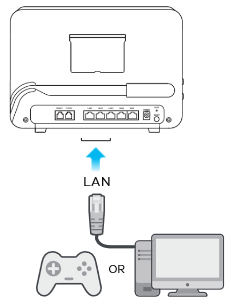
Configuring the router
Quick start wizard setup
-
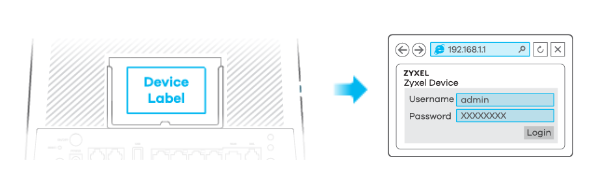
- Open a web browser on a connected device and type 192.168.1.1 into the address bar before pressing Enter.
![Address Bar]()
- Enter the default Username (admin) and the Login Password (located on the card provided, or device label)
![Username and Password]()
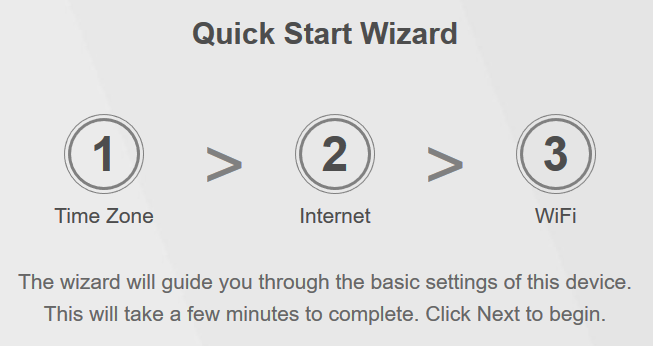
- Once logged into the Router, you may be redirected to the Quick Start Wizard.
![Quick Start Wizard]()
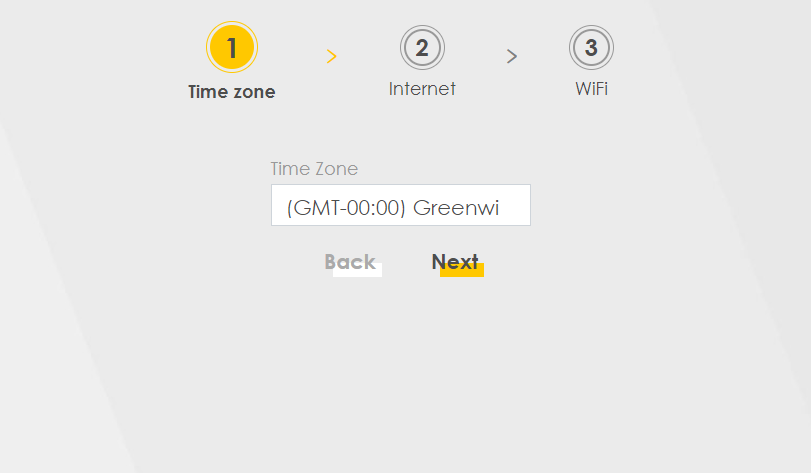
- Select the correct Time Zone, then click Next.
![Time Zone]()
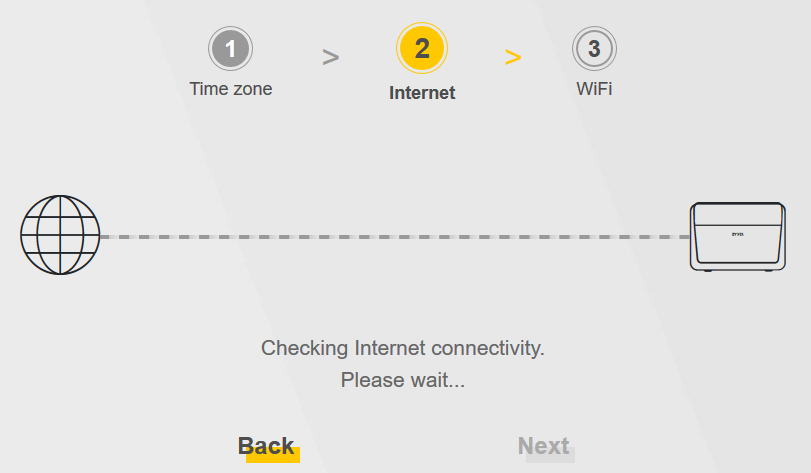
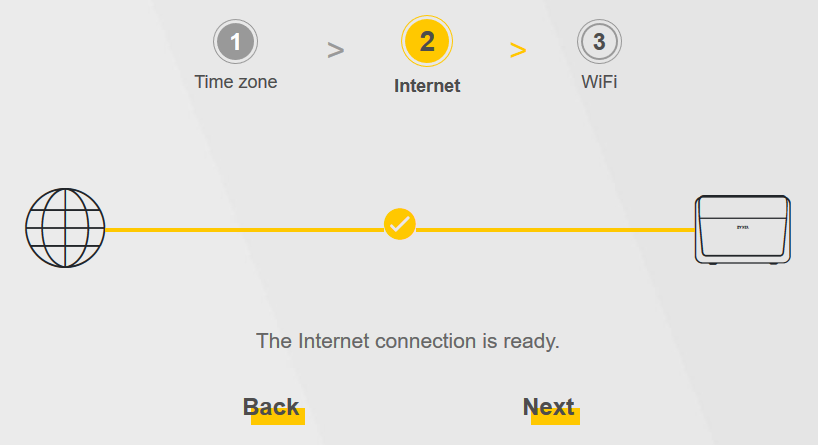
- Make sure that you have your KCOM username and password to hand, then press Next to begin scanning for an internet connection.
![Internet]()
- If no Internet connectivity is found, enter your KCOM username and password in the PPP boxes provided.
![Connection Ready]()
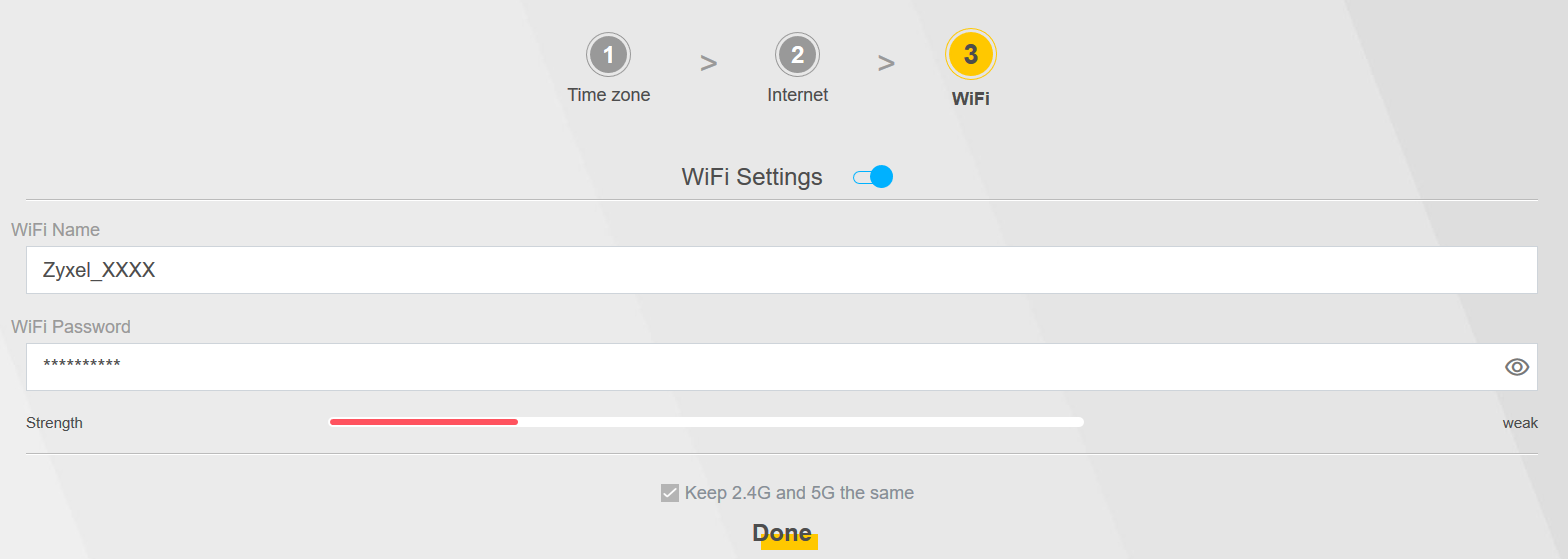
- Optional - You can change the WiFi name and password to something easier to remember.
![Wireless Name and Password]()
- Press Done to save these settings.
- Open a web browser on a connected device and type 192.168.1.1 into the address bar before pressing Enter.

Was this article useful?