How do I setup my email on Windows 10?
Written by KCOM Support on 11/06/2025. Posted in Broadband.

This guide is for Windows 10 computers and tablets. Guides for setting up email on other devices can be found here.
How to Add Your KCOM Email Account on Windows 10
- Open the Mail app by pressing the Windows Start Menu and selecting Mail.
![Mail App]()
- If this is the first time you've opened the Mail app, you'll see a Welcome page. Select Add account to get started.
![Add Account]()
If you've used the Mail app before, at the bottom of the left navigation pane, select![Cog icon for settings]() Settings and then choose Manage Accounts.
Settings and then choose Manage Accounts.![Manage Accounts]()
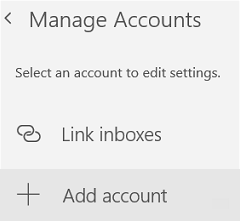
- Select Add account.
![Add Account]()
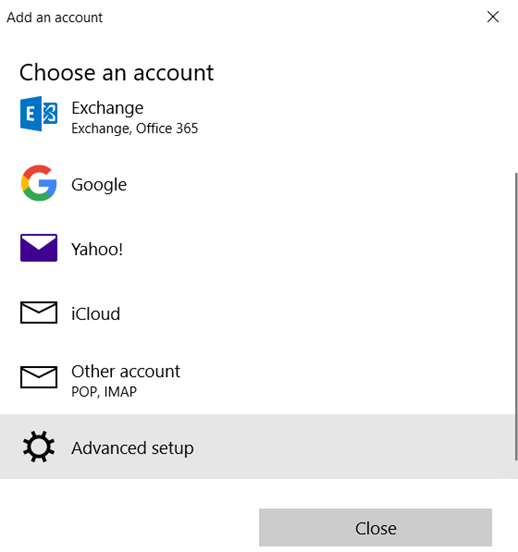
- Choose the account type. Scroll down and select Advanced setup.
![Advanced Setup]()
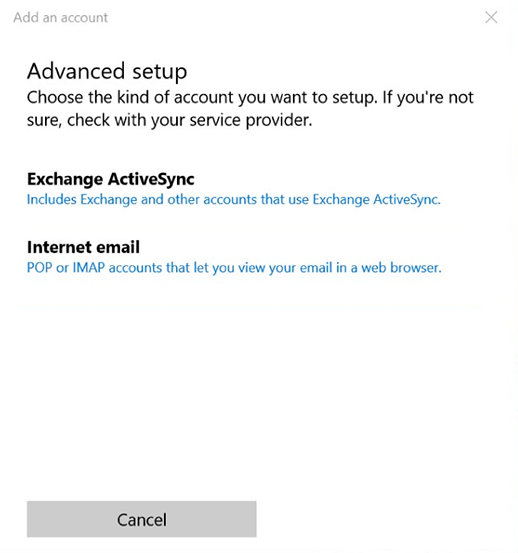
- Select Internet email.
![Internet Email]()
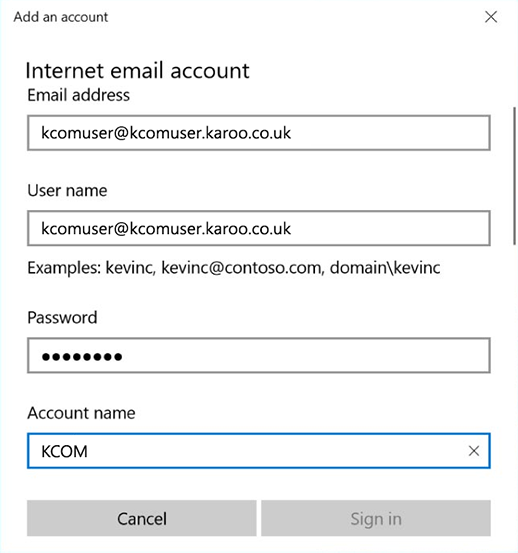
- Enter the following information in the Advanced setup window.
- Email address: Your KCOM email address
- User name: Your KCOM email address
- Password: Your email account password
- Account name: A name for your account, e.g. KCOM
- Send your messages using this name: The name you want to send from, e.g. Sarah
![Setup]()
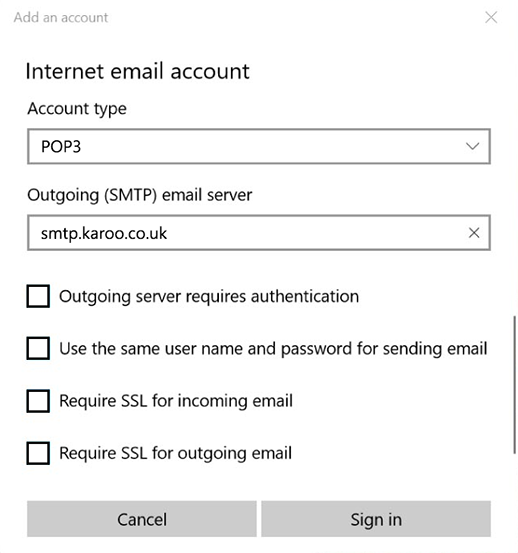
- For the next two settings, decide whether you're going to use POP or IMAP.
POP
This method will pull all of your emails from our server and store them on your device. If you use Webmail then this means you may not be able to see your emails when they are pulled onto your device. You may need to change your account settings so it leaves a copy of the messages on the server.
IMAP (Recommended)
This method will sync your emails and folders exactly with how they are on Webmail. The downside to this is that if you don't manage and delete your emails frequently, your mailbox may become full. Your mailbox allowance is 250MB.- Incoming email server: pop.karoo.co.uk or imap.karoo.co.uk
- Account type: POP3 or IMAP4
![Setup]()
- Fill in the rest of the settings before pressing Sign in.
- Outgoing (SMTP) email server: smtp.karoo.co.uk
- Outgoing server requires authentication: This should be unticked
- Use the same user name and password for sending email: This should be unticked
- Require SSL for incoming email: This should be unticked
- Require SSL for outgoing email: This should be unticked
![Setup]()


 Settings and then choose Manage Accounts.
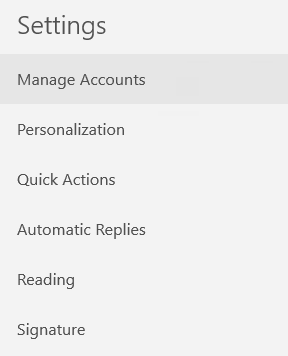

Your email should now be set up on Windows 10.
Was this article useful?